


| | | |
 |  |
Modules
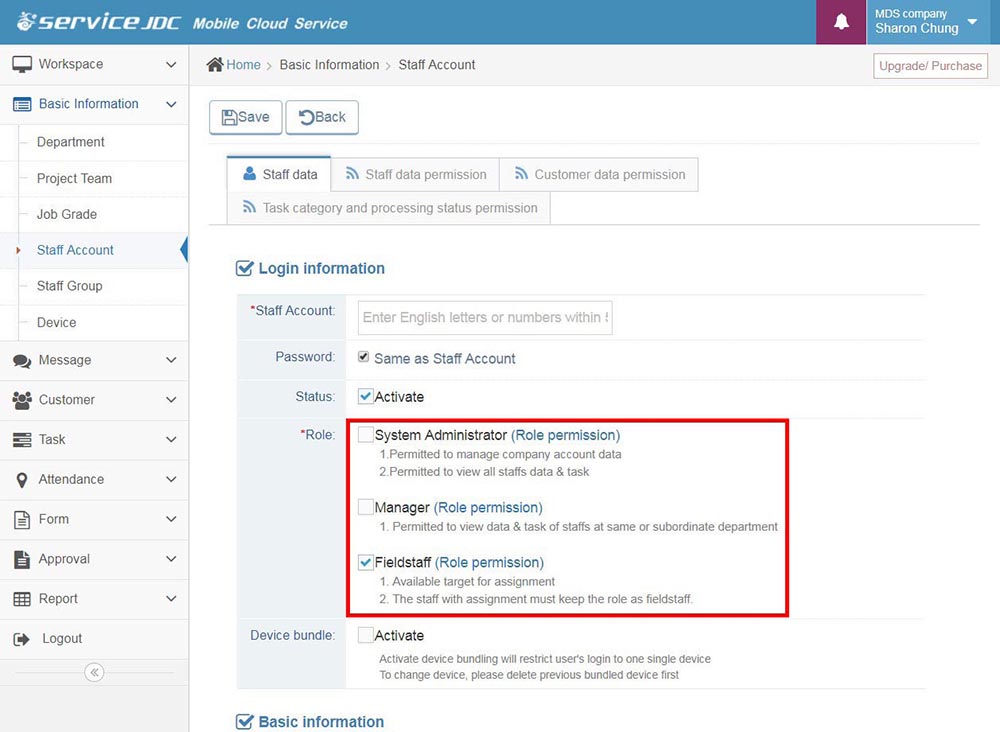
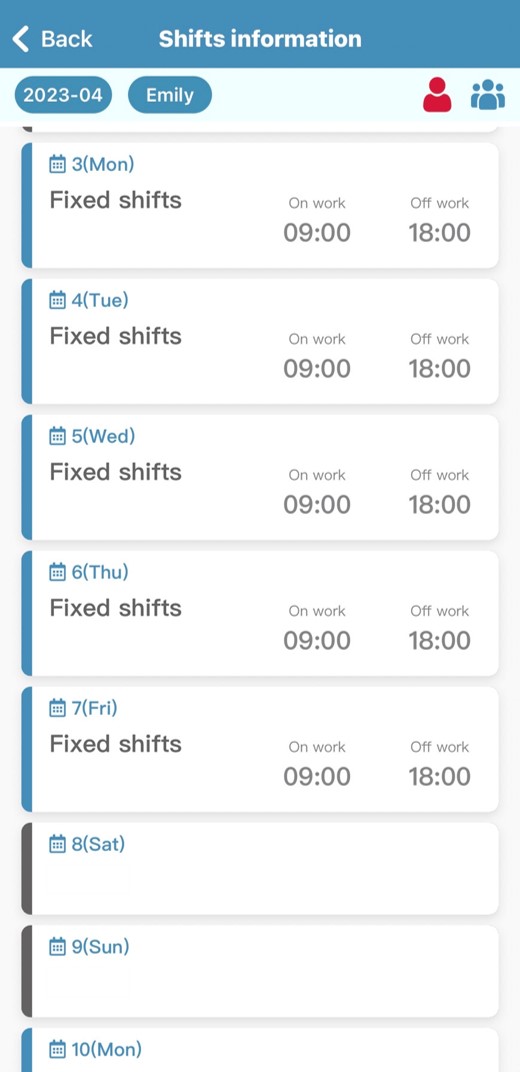
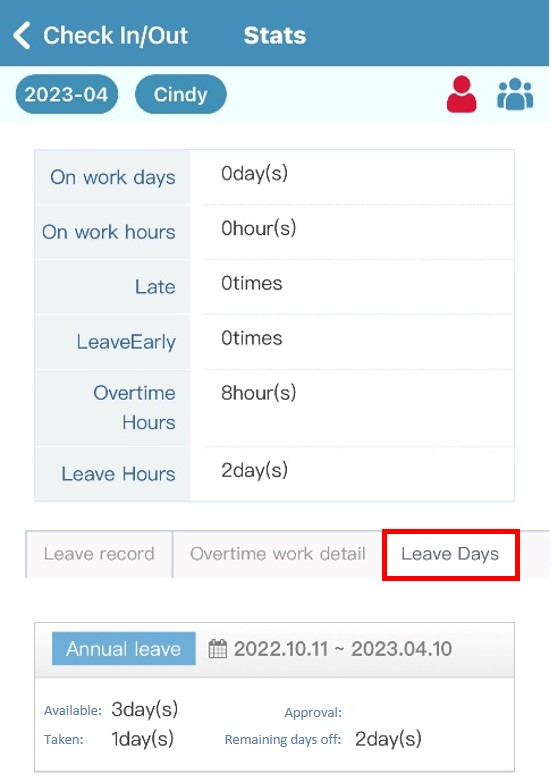
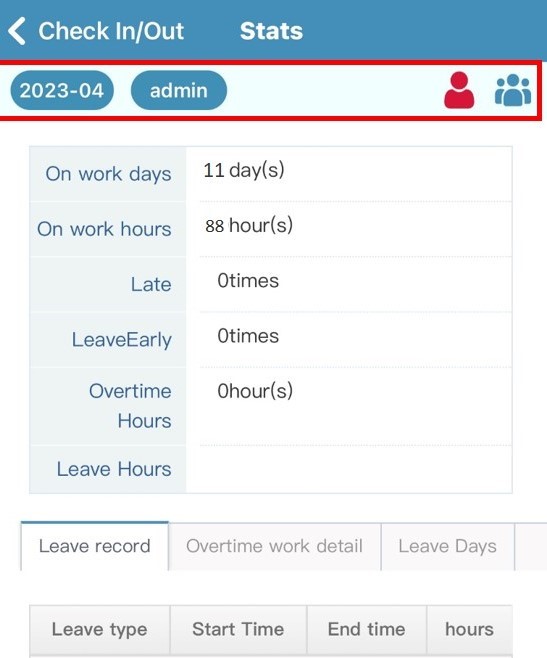
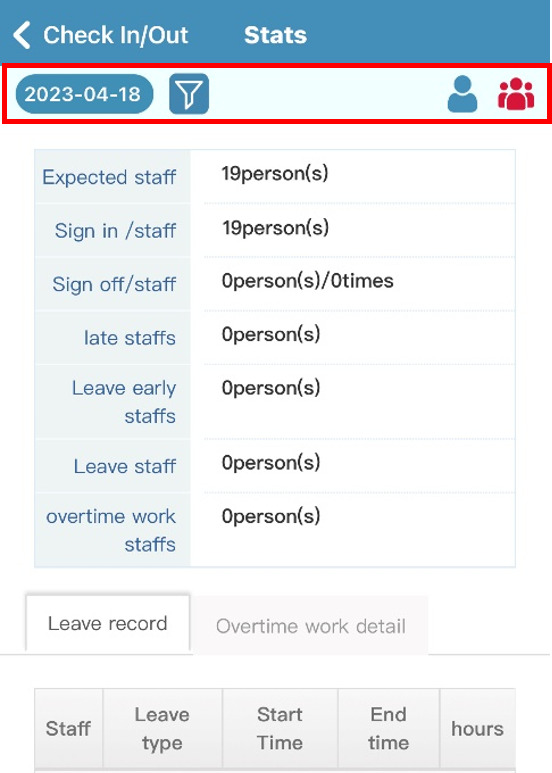
Field Staff Management
Field Work Assistance
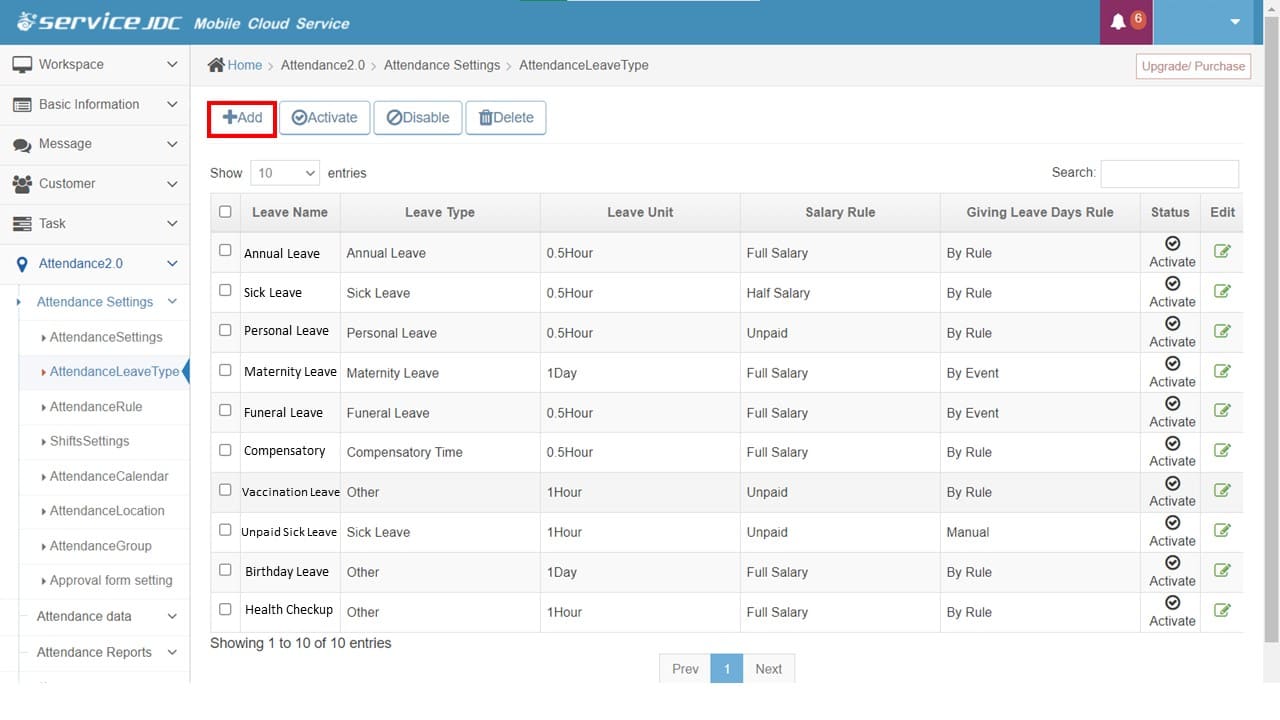
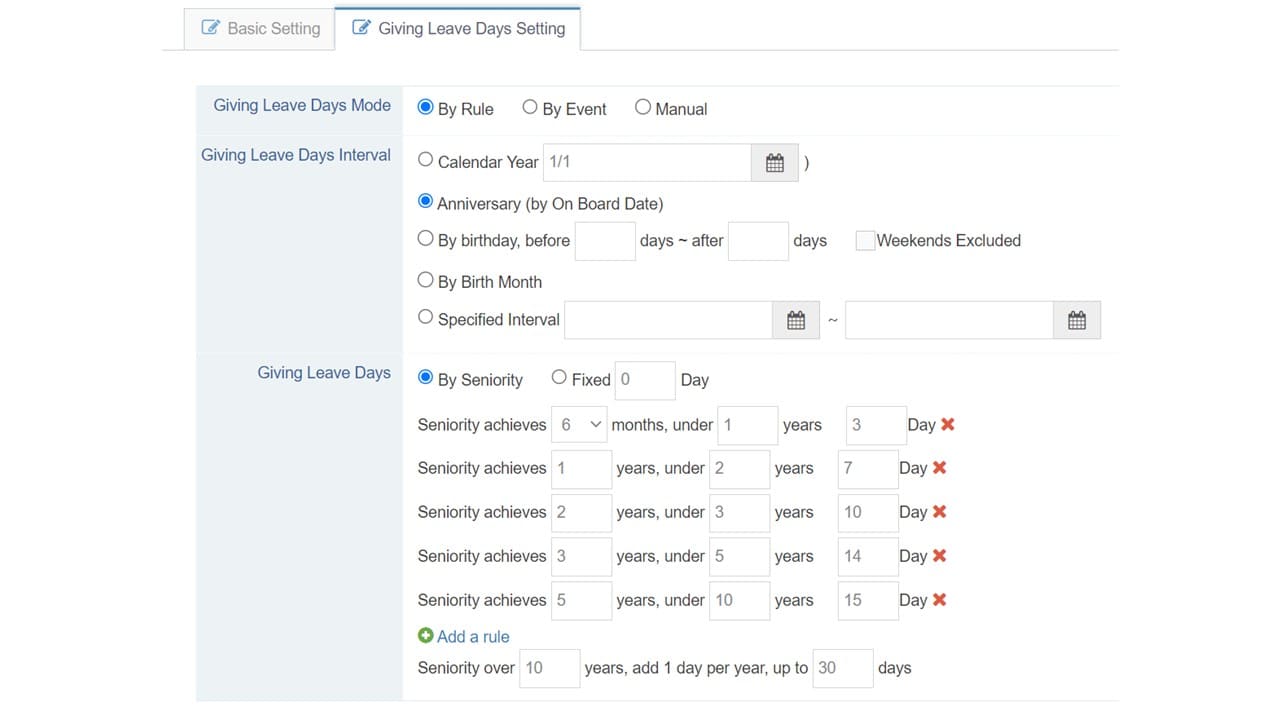
Approval Management
Customer Management
Equipment Management
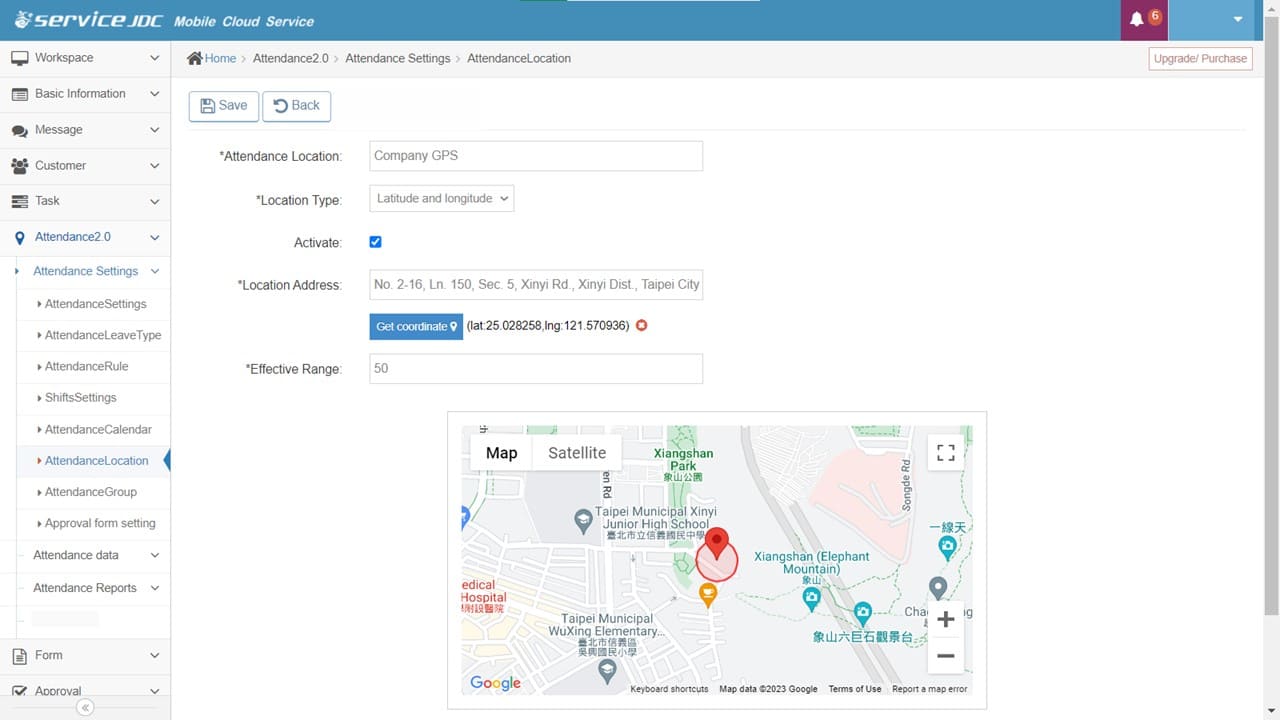
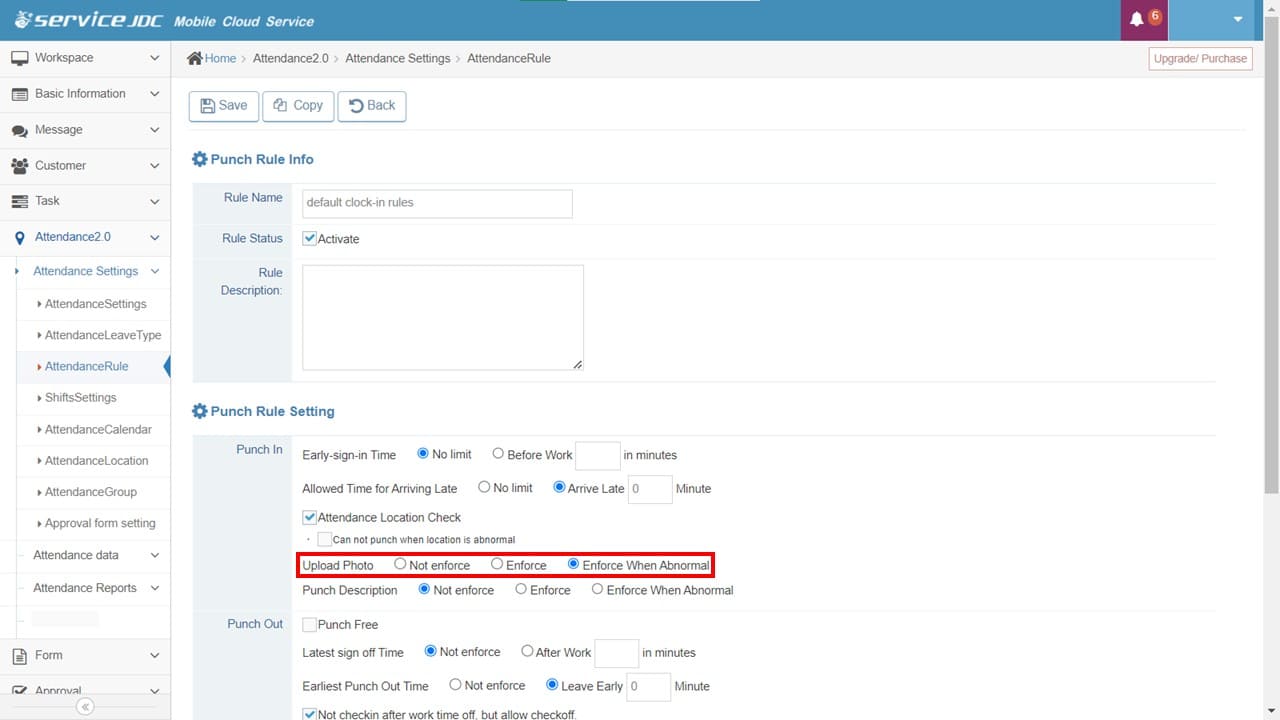
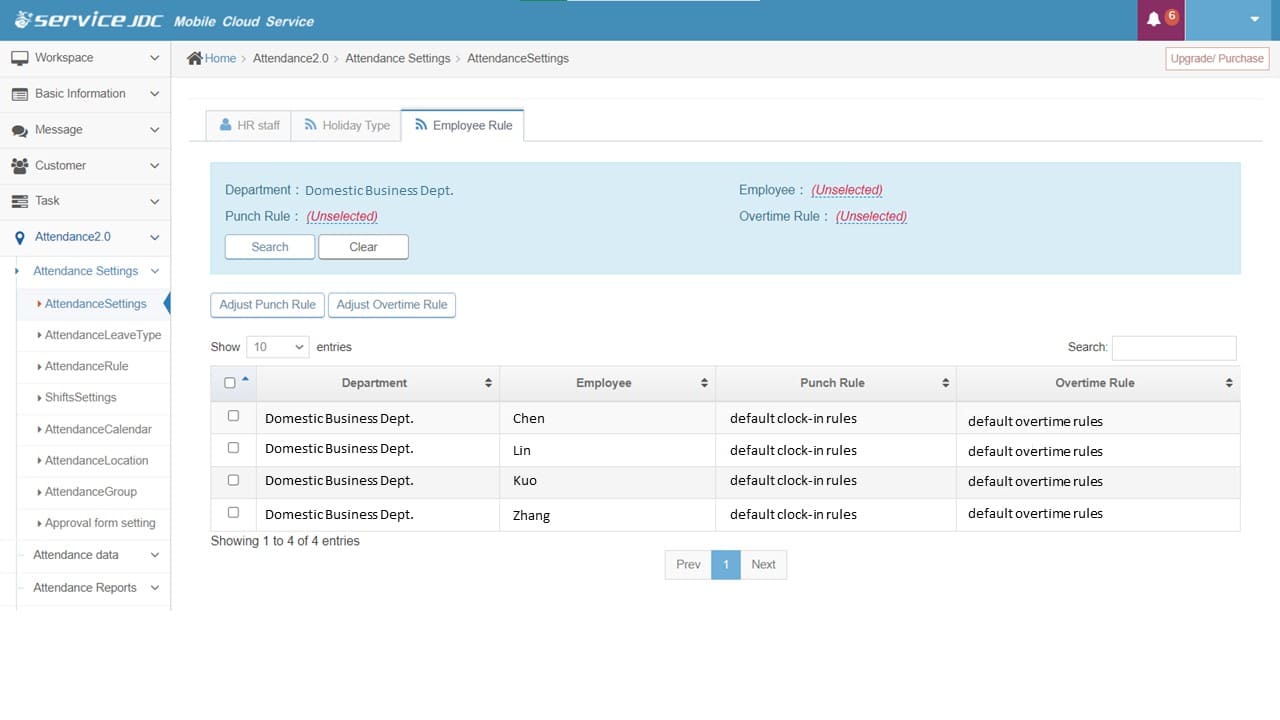
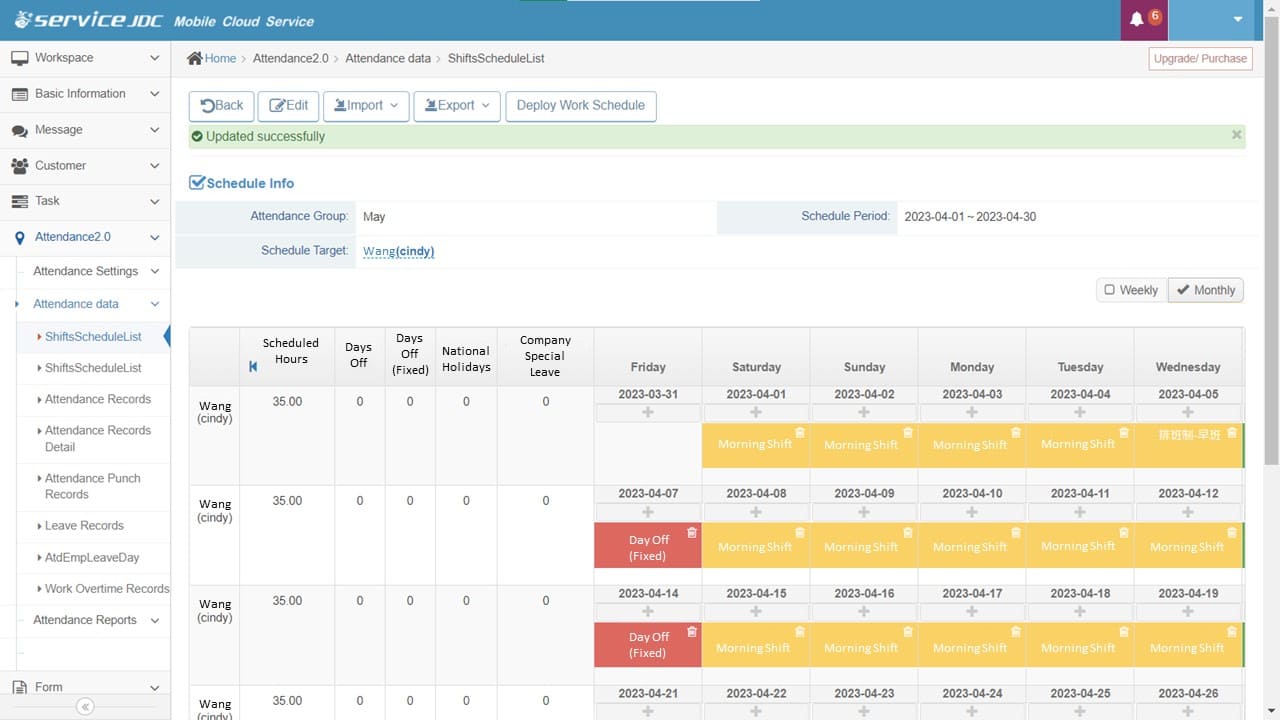
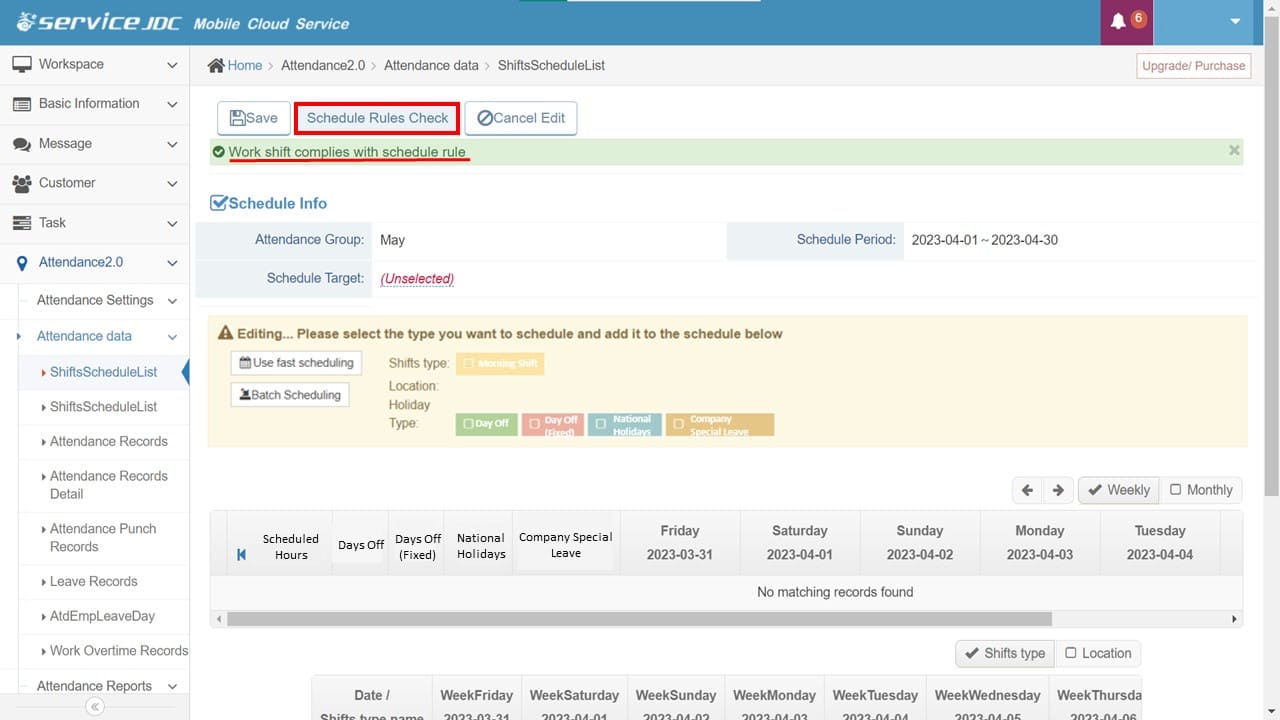
Schedule Management
Contract Management
Mileage Management
Business Intelligence Analysis
Customer Service Chatbot
Scenarios
Sales Management
Maintenance Management
Merchandising Management
Patrol & Inspection
| | | |
|
|